 |
| Steampunk Dead Man's Hand Top Hat |
 |
| Beautiful Brassy Thread |
I don't sew much myself, but I'm crafty. So when I needed to Steampunk my costume, I knew I could pull it off.
This is just one of the projects, I took a LOT of pictures to try to help you along and feel free to use your own creative juices!
 |
| Cheap Hat :) |
Ok, first things first, materials! I used one of my own little creations that I normally would use for a hair piece. You can find these pieces separately and put together yourself at your local hobby store or buy a completed one from my Etsy Store. I would use one of the bobby pin backed ones if you choose to buy one from me that way you can slide it into your hat's ribbon. I also used two clock hands, a cheap hat I found at a costume store ($5.00), matte thin (about a centimeter in width) brown ribbon, this beautiful brassy thread, and glue. I used both Jewel-It and two part Epoxy. You will also need a somewhat thick quilting needle, black thread, deck of cards you don't mind stealing from, and straight pins. Tools for this project will be scissors, a bit of 20 gauge wire (to mix the epoxy), and a small hand drill. All of this can be found at the hobby store, so no worries!
Step1: Pull out your cards and glue together. Set them aside and wait for them to dry.

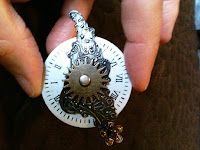
Step 2: Take your gears and such to complete your center piece, you can use a scrap booking brad to attach all your bits, clock hands, and fabric flowers. You will attach the feather later. If you bought a piece from me, skip this step!
 |
| I used the opposite side of these hands which are silver. |
 |
| All the doo dads added, now add your flowers if you like, behind this on the brad. |
Step 3: Cut off your factory ribbon and carefully glue here and there and pin your brown ribbon to the hat until you get the width you like. If you chose a thicker ribbon just pin on.
Step 4: Sew the ribbon on with your black thread at the back. Pull out the pins.
Step 5: If your glue is dry on your cards, drill two holes like a button to sew onto the hat. Then go ahead and sew the cards on with the black thread.
 |
| Put the card hand up to the hat to determine where the holes should be so they are covered by your centerpiece. |
 |
| Button style holes. |
Step 6: Mix a small amount of your two part epoxy, attach your feather onto the hat or cards where it looks the best. When it has dried, mix another small batch of epoxy, then glue the flower, gear centerpiece over the feather end and make sure to cover the "button holes". Hold this in place until the left over glue that you mixed is dry. This way you know the glue on the hat is dry and everything won't move on you.
Step 7: Use the brassy thread to tack in around the tips of your flower. Just small little stitches to aide the glue in keeping everything together.
You're done! Piece of cake....


