Etsy Store

Wednesday, December 7, 2011

Pokemon T-Shirt Tutorial, DIY Pikachu

I love winter time, especially when it's snowing.  If it's going to be grey outside, then the ground had better glow!  Gives you a chance to get some reading done, do a project, or snowball fights!  Soon a lot of children will be off school for winter break.  This is a fun (and inexpensive) project that you can do with your little one! 
My son loves cartoons and we decided on Pikachu.  If you have a plain shirt or hoodie already then you're one step ahead of us! I purchased a plain yellow shirt for about $4, picked up some tan, red, white, and black felt from the hobby store, a fabric glue stick, and I already had some black thread and a needle and scissors.  So total cost was under $10.00.  
First, I washed the shirt and felt to make sure that they wouldn't warp once placed on the shirt.  Second, I went on the Internet to find a good picture to eyeball the shapes I would need to cut out of the felt.  Most cartoons have simple lines to their faces so picking out the basic shapes that make up the eyes, nose, etc should be easy.  If you have fabric chalk and trust your young one with scissors, trace out the shapes for them then let them cut them out.  Before using the glue stick, place all the shapes on the shirt and make sure they are spaced well.  Then hand over the glue stick and start stickin'!   Let the glue dry for about 20 minutes or so then take your black thread and a needle and make some stitches all around all the glued pieces to make sure the parts don't come off in the wash.  This is the only boring part of the project, mom.  But it's not so bad.  I was watching Indiana Jones Last Crusade and it took me from them starting the fire in the castle and hiding in the fire place to dropping the Holy Grail down the fissure and the blond going down with it.

I would either put this shirt in a pillow case when you wash, use the delicate cycle, or even better BOTH!  Don't want to loose a cartoon eye!
Have fun!!
Don't feel crafty but still want a great shirt? Check out these fine Etsy friends doin' it right!

Thursday, November 3, 2011

New Arrivals and Goodies Gallore!

New Pictures for the Etsy Store!

I love taking pictures on a pretty day.  Boy was yesterday just wonderful!  I am definitely not a professional photographer, but I enjoy a good point and click.  I would also like to thank 20 Brix for allowing us to use their great patio for our location.

Taken by Ariel
Ariel, my sister-in-law, was generous enough to allow me to use her not only as a model but use her equipment.  She also took some of these lovely pictures too. Leiann, my co-worker, also helped me tremendously as my model.  Thank you girls for a great day.
 

Many of the pictures I take are for the "Phoenixbartender" Etsy Store, but I also use many of them for promotional reasons too.  I'm going to share some of these with you now.  Enjoy! ~


Modeling Drusy Quartz and Hypersthene hand embroidered Necklace and
vintage-style typewriter key steampunk earrings.

Here we see a new addition, Hand Knitted Scarves! Ahh...warm!

Feather Headband with hand stitched beading, so trendy...

She's got a bit of everything! Nice warm scarf and cuff links, custom order, and a lovely hair piece.

Steampunk vile earrings, already available on my website.  Sun Spots hand embroidered on upcycled car leather Necklace.  NEW addition! Hand woven brooch with garnets.
I will be adding listings shortly for some of these fine items! 

Tuesday, November 1, 2011

Be Crafty Tutorial, Make Steampunk Goggles

Steampunk Goggles, Be Crafty

Factory-made goggles, found at a costume store.

I was looking for something interesting to steampunk for my husband last minute (of course! I only work under pressure) and I found these goggles at a chain costume store.  The mask attached to this pair was stinky and only covered the nose and upper lip....ok so that's a thumbs down.  So I decided to make them a bit more interesting.  I'm going to share what I did with you and I hope you find it helpful!

Step 1: Remove the stinky mask. Use a small Phillip's head screwdriver for this step.

You can discard this mask, or save it for another project.
Step 2:  Assemble your items to attach to your goggles.  I used 2 "C" clamps from the hardware store, two circular gears from Vintaj, 6 nuts, a game piece arrow, and reused the screws that were used to attach the mask to the goggles.  You will also need two part epoxy.


Step 3: Place your "C" clamp onto the side of the goggles, find where you will be drilling a small hole for the screw.  Do the same for the gear.


Step 4:  Screw in your parts.


Step 5: Screw in the game spinner to the center.  There will already be a hole from removing the gas mask.


Step 6:  Mix your 2 part epoxy, wait for it to get a little tacky, almost like hot glue but not as thick.  Use the glue to attach the nuts to the top of the goggles.  (For added assurance, you can put in some screws, drill a pilot hole for them before gluing.)


Well HOOOOOWDY!! You're done!


Monday, October 3, 2011

Be Crafty Steampunk Hat Tutorial, Do it Yourself!

Steampunk Dead Man's Hand Top Hat


Beautiful Brassy Thread

I don't sew much myself, but I'm crafty.  So when I needed to Steampunk my costume, I knew I could pull it off.
This is just one of the projects, I took a LOT of pictures to try to help you along and feel free to use your own creative juices!
Cheap Hat :)
Ok, first things first, materials!  I used one of my own little creations that I normally would use for a hair piece.  You can find these pieces separately and put together yourself at your local hobby store or buy a completed one from my Etsy Store.  I would use one of the bobby pin backed ones if you choose to buy one from me that way you can slide it into your hat's ribbon. I also used two clock hands,  a cheap hat I found at a costume store ($5.00), matte thin (about a centimeter in width) brown ribbon, this beautiful brassy thread, and glue.  I used both Jewel-It and two part Epoxy.  You will also need a somewhat thick quilting needle, black thread, deck of cards you don't mind stealing from, and straight pins.  Tools for this project will be scissors, a bit of  20 gauge wire (to mix the epoxy), and a small hand drill.  All of this can be found at the hobby store, so no worries!

Step1: Pull out your cards and glue together. Set them aside and wait for them to dry.

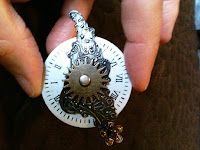
Step 2: Take your gears and such to complete your center piece, you can use a scrap booking brad to attach all your bits, clock hands, and fabric flowers. You will attach the feather later. If you bought a piece from me, skip this step!
I used the opposite side of these hands which are silver.

All the doo dads added, now add your flowers if you like, behind this on the brad.
Step 3: Cut off your factory ribbon and carefully glue here and there and pin your brown ribbon to the hat until you get the width you like.  If you chose a thicker ribbon just pin on.

Step 4: Sew the ribbon on with your black thread at the back.  Pull out the pins.

Step 5: If your glue is dry on your cards, drill two holes like a button to sew onto the hat.  Then go ahead and sew the cards on with the black thread.
Put the card hand up to the hat to determine where the holes should be so they are covered by your centerpiece.

Button style holes.

Step 6: Mix a small amount of your two part epoxy, attach your feather onto the hat or cards where it looks the best.  When it has dried, mix another small batch of epoxy, then glue the flower, gear centerpiece over the feather end and make sure to cover the "button holes". Hold this in place until the left over glue that you mixed is dry.  This way you know the glue on the hat is dry and everything won't move on you.

Step 7: Use the brassy thread to tack in around the tips of your flower.  Just small little stitches to aide the glue in keeping everything together.
You're done!  Piece of cake....